My photo
Philippines
Art. Passion. Turning even the simplest thing to a breathtaking masterpiece. (Creation) Conceptualized by my husband, Ryan, OBRA deals with art in all forms aesthetic. We believe that there's beauty in everyone and everything waiting to be discovered and unleashed. Started of as a hobby, my curiosity for nail art and designs, had soon panned out to creative styling, photography and make up artistry. Participated in countless number of workshops and trainings, I stay adept with what's current and trendy without compromising class and elegance. OBRA, in its' truest sense is a Masterpiece and I strive to deliver nothing less.
If you have any question regarding my blog posts, ideas, if you have something to say/share, or you want me to review your product just email me at mae_espiritu@yahoo.com
Thank you very much.

Followers

Showing posts with label stamp. Show all posts

Monday, July 1, 2013

Advance Stamping Technique Tutorial

Here's my simple step by step tutorial! Enjoy! Happy stamping everyone!
"PIRATES OF THE KITTY - REBIANS"
MJ Hello kitty special edition image plate (MyOnline Shop)
A48 i.p.
l.a brites "flare up"
jocarste white
advance stamping technique
 
Step by step tutorial
✏Advanced stamping technique 

1. Apply your desired base coat.

2. Fill the stamp with colors.
(You can use regular polish or 
acrylic) Let dry.
3. Apply top coat / clear coat on nails.
( if you use acrylic, apply top coat on the stamp not directly on nails to keep the design intact .) 
4. Stamp on nails.
5. Apply top coat.


 My random designs using advance stamping technique! 
ENJOY! ♥
 "HELLO KITTY"
nabi scented "pinkies"

dark purple s.p
mj special edition hello kitty image plate
sally hansen topcoat
decal stamping technique


Step by step procedure provided by:
 "PINK PIGLET"
MJ special edition ( MyOnline Shop)

MJ XVIII
XL U 

"POOH AND THE BEES"
special edition MJ image plate and MJ VI ( MyOnline Shop)
BM301
advance stamping technique
 
 "THE MAGICIAN"

MJ XVIII ( MyOnline Shop)

MJ VI 
XL U
advance stamping technique

✏ Hello Kitty
1. Apply 4 different colors of basecoat.
Let Dry

2. Stamp it with MJ XX (full stamp)
3. Stamp it with HK special edition MJ image plate 
( I used white special polish for the first layer.)
Fill the hk stamp with white polish.
4. Stamp again with mj special edition. ( I used black special polish for my 2nd stamp to make the image appear.)
5. Apply top coat!


 HOPE YOU LIKE THEM! GOD BLESS

P.S dont forget to add / follow me on facebook : MY FACEBOOK
and instagram @maespiritu_artofnail
thanks guys!!!


Wednesday, May 29, 2013

I'm hooked!

Hello readers!
 Who doesnt know the game Candy Crush Saga! I know most of you are already into this game! My son loves it! and so do I! It's a very addictive puzzle game! Guest what! ?
My title has something to do with my mani. Recently I received a package which came from MyOnline Shop on facebook. They are selling different kinds of image plates.
I first tried the candy crush emblem (MJ XIX), a full design train (MJ XX) and a candy (MJ XII)! What can you say about it?

BTW, 

 Here are some of the scanned pictures of the image plates with different designs that I received. And it has a special "Hello Kitty" design which is my favorite! Yay!  look at  how cute the hello kitty image plate is.. I love them very much! Will use it for my next post. Stay tuned!

You can buy them here: MyOnline Shop
MyOnline Shop Storenvy 
For  Php 750.00 / $18 
You will get a FREE special edition image plate by purchasing all 10. How good is that! Hurry up! Available until stocks last! 


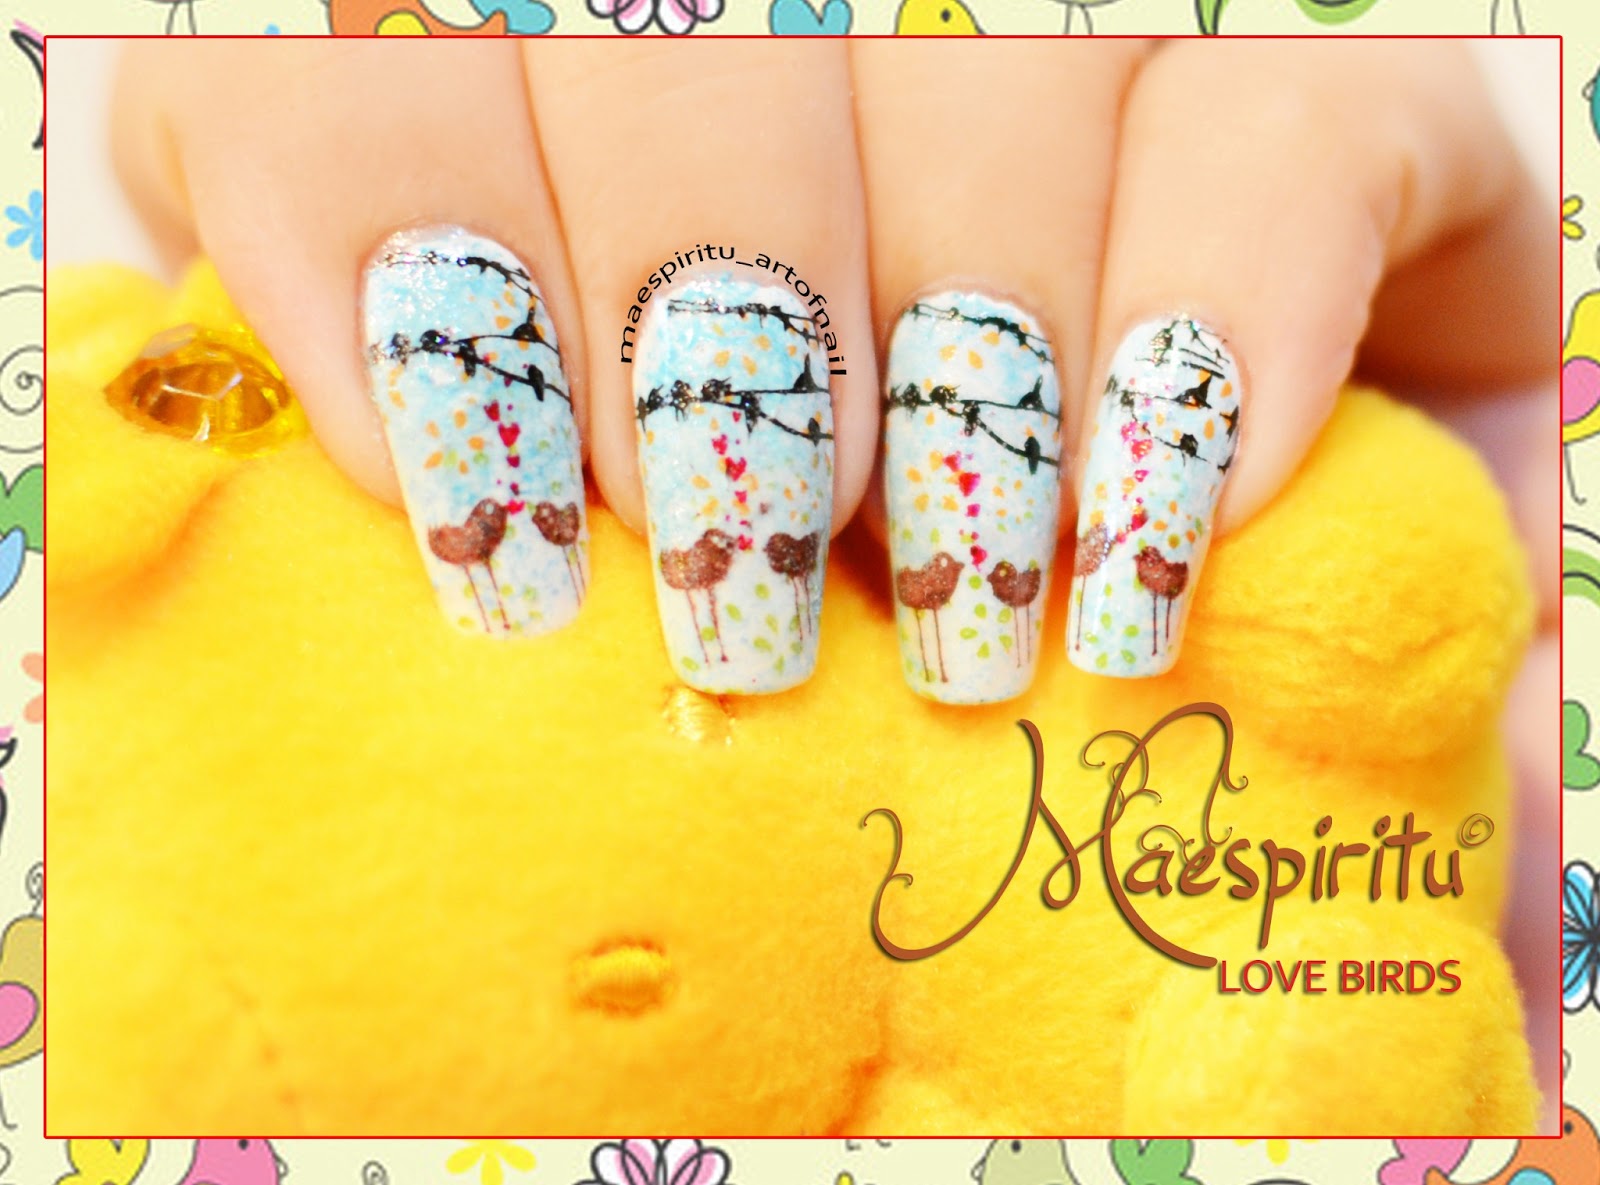
The second mani I made is stationery paper inspired nailart. I entitled it "Love Birds".
I used MJ XIX for the birds on the wire, and QA 10 for the birds kissing with the heart design. I really like the color I used in this mani. How about you? Which of my two mani do you like most?! 

Hope you like them! God Bless! ♥


Monday, April 15, 2013

"Cold Summer Nights" Step by step tutorial by Request


"Cold Summer Nights"
Step by step tutorial by Request (Lynn Thomson)
1. Prepare all materials.
Jocarste black 
enchant black beauty
Bonbon
special polish: (Fab Ur Nails Shop)
white, green, blue, orange and yellow
image plate:
Bm02
Amisy f05
M42
Seche vite top coat
2. Apply your desired basecoat. 
I applied 1 coat of "jocarste black."
3. For the second coat, I applied "enchant black beauty" let dry
4. I used yellow and orange special polish for coconut tree design.
(this will look like this)
Scrape down, then stamp it.
I erased the name california..
5. Stamp it on your nails.
6. For my wave design, I used amisy f05 and blue special polish. 
7. I placed my design on the tip of my nails.
8. I used bm02. I stamped some designs to add a little sparkle in the night sky.
Stamp it with green and white special polish.
9. I applied some bon bon nail polish (bon bon nail polish duo chrome effect) to give an impression of stars in a night sky.
10. Apply top coat. 
And here's the finished product hope you like it! God Bless!!